material testing on the Instron

I had the opportunity to test the stiffness of my knit materials on and Instron loading machine in the Engineering Lab at MIT. It was pretty fascinating to watch the machine stretch the fabric to failure while recording data such as load and displacement. 

This test is seen as a first step to gather a stiffness value based on a uni-axial load. Future tests will incorporate bi-axial loading and eventually off axis loading. Below are the results of testing 4 knit patterns. 

elemental material catalog

Since my thesis presentation in December, I have been gathering a range of material types to construct a catalog of elemental patterns. This catalog will be tested with comparative structural loading and results will be documented to map material behavior to pattern. Additionally, I have been experimenting with how to represent the patterns constructed in a way which breaks down the inter-looping of each column and row of fibers. Below you'll find diagrams of material patterns as well as photo documentation of a selection of material samples.   

machine building update

Anxious to see my new Kenner Automatic Knitting Machine in action, I disassembled it, cleaned the knitting needles and plastic carriage, and applied generous amounts of machine oil. I was able to knit pretty consistently  after some trial and error. Testing will include integrating new fibers and patterning to test the flexibly of the machine.

To progress on the circular knitting machine, I have begun to integrate my new stepper motor. It was a bit tricky to wire since I had to change my power supply to 12V. After discussing with experts (aka classmates), I finally have the motor spinning. After a bit more work I will have it integrated into the machine by swapping out the old, less powerful stepper. 

Today I was also pointed to a project I have yet to come across titled '24 Bit Friendship Loom' by Ilan Moyer. The machine was built as part of his Masters Thesis at MIT. See video here

netting update

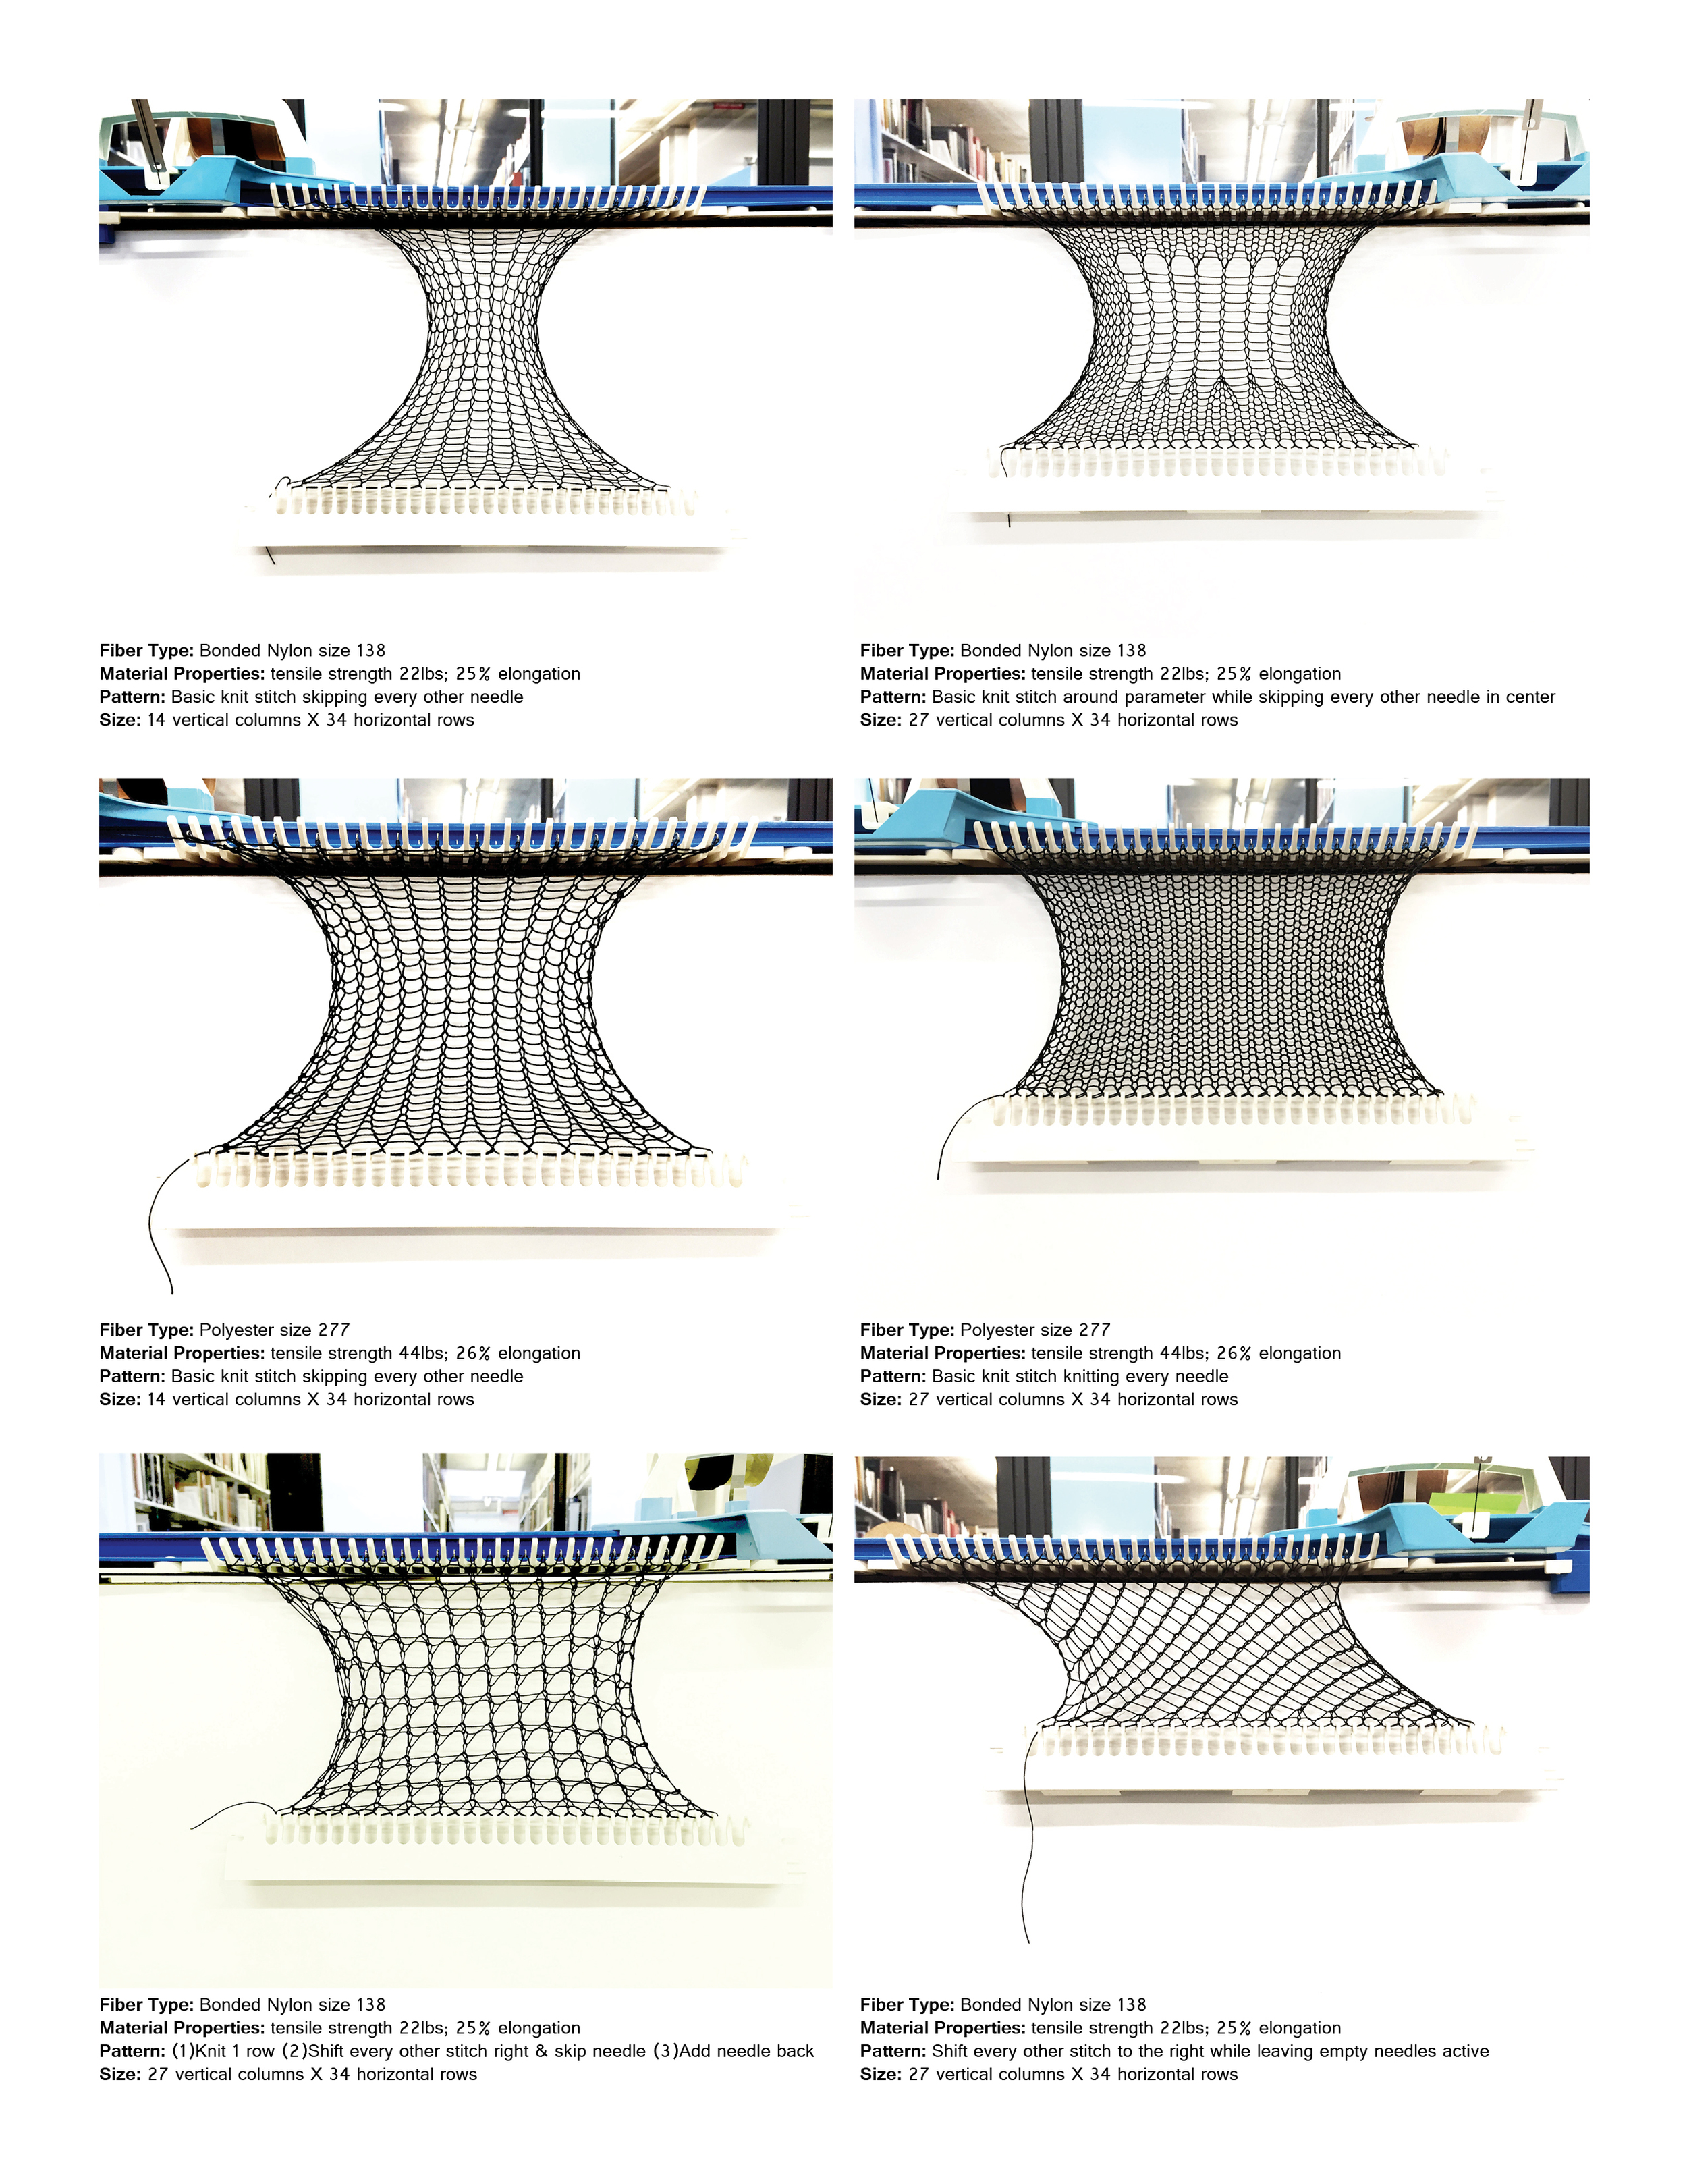
The goal for this week was to produce material samples to display the functionality of the machine. Unfortunately the tension of the string feeding into the machine is still causing problems. The needles fail to push the old row off of the needles therefore jamming the fibers into the carriage. I predict this is due to over stressing the yarn to the point that the small stepper motor can no longer turn the carriage. In attempt to relieve tension from the string, I added new components to the casing to hold a spool of yarn and clamp the assembly to the table (photo 1). Allowing the yarn to spin freely has helped significantly. In addition, a new (stronger!) motor is was ordered with a stronger torque.

While having difficulty producing a material output, I made small advancements in sending specific code to the machine. I created a very basic parametric drawing to control where voids in the knit pattern should exist. The program assumes you will knit around half of the carriage to make a flat knitted panel. While the width of the textile is fixed to half the circumference of the carriage, the height is not. A base grid represents the rows and columns of the textile. Closed boundaries can be drawn into the grid to mark voids in the surface or regions that material is not wanted. The program outputs a text document with commands corresponding to the specified design. This document is imported into Arduino to control the machine. 


The carriage in the video below is controlled by the above pattern.